读写图像

相关函数

读取图像

函数原型:

1
Mat imread(const String& filename, int flags = IMREAD_COLOR)

第一参数为图像路径,第二参数为加载图像的形式(默认加载彩色图像)。

第二参数可选参数有三种:

  1. 0IMREAD_GRAYSCALE ,表示加载灰度图像。

  2. 1IMREAD_COLOR ,表示加载彩色图像(默认)。

  3. -1IMREAD_UNCHANGED ,表示加载包括alpha通道。

创建窗口

函数原型:

1
void namedWindow(const String& winname, int flags = WINDOW_AUTOSIZE)

第一参数为窗口名字,第二参数为窗口形式。

窗口形式常用有两种:

  1. WINDOW_AUTOSIZE 表示固定大小(默认)。

  2. WINDOW_NORMAL 表示可调节大小。

显示图像

函数原型:

1
void imshow(const String& winname, InputArray mat)

第一参数为窗口名字,第二参数为图像对象名称。

写入图像

函数原型:

1
bool imwrite( const String& filename, InputArray img, const std::vector<int>& params = std::vector<int>())

第一参数为存储图像路径,第二参数为图像对象名称,其余参数不重要。

等待延时

函数原型:

1
int waitKey(int delay = 0)

参数为延时的毫秒数,默认为0,即无限时等待键盘输入。

窗口销毁

函数原型:

1
void destroyWindow(const String& winname)

参数为销毁的窗口名称,一般情况下系统会自动回收。
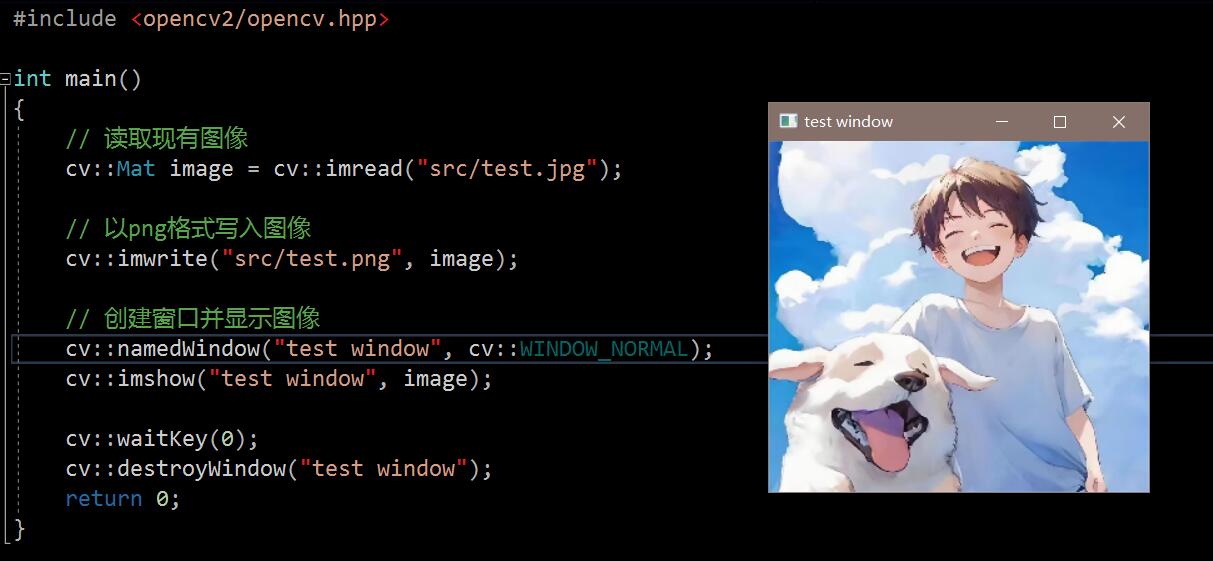
示例代码

1
2
3
4
5
6
7
8
9
10
11
12
13
14
15
16
17
18
#include <opencv2/opencv.hpp>

int main()
{
// 读取现有图像
cv::Mat image = cv::imread("src/test.jpg");

// 以png格式写入图像
cv::imwrite("src/test.png", image);

// 创建窗口并显示图像
cv::namedWindow("test window", cv::WINDOW_NORMAL);
cv::imshow("test window", image);

cv::waitKey(0);
cv::destroyWindow("test window");
return 0;
}

运行窗口

读写视频

相关概念

VideoCapture类

VideoCapture类提供了有关视频的操作:

1
cv::VideoCapture cap(0);

创建VideoCapture实例,使用构造函数,传入参数0表示设备0。

1
bool isOpened()

确认摄像头是否开启成功。

1
bool grab()

确认摄像头在运行中是否捕获到帧。

1
bool read(OutputArray image)

将视频捕获对象中捕获到的图像输出到image中。
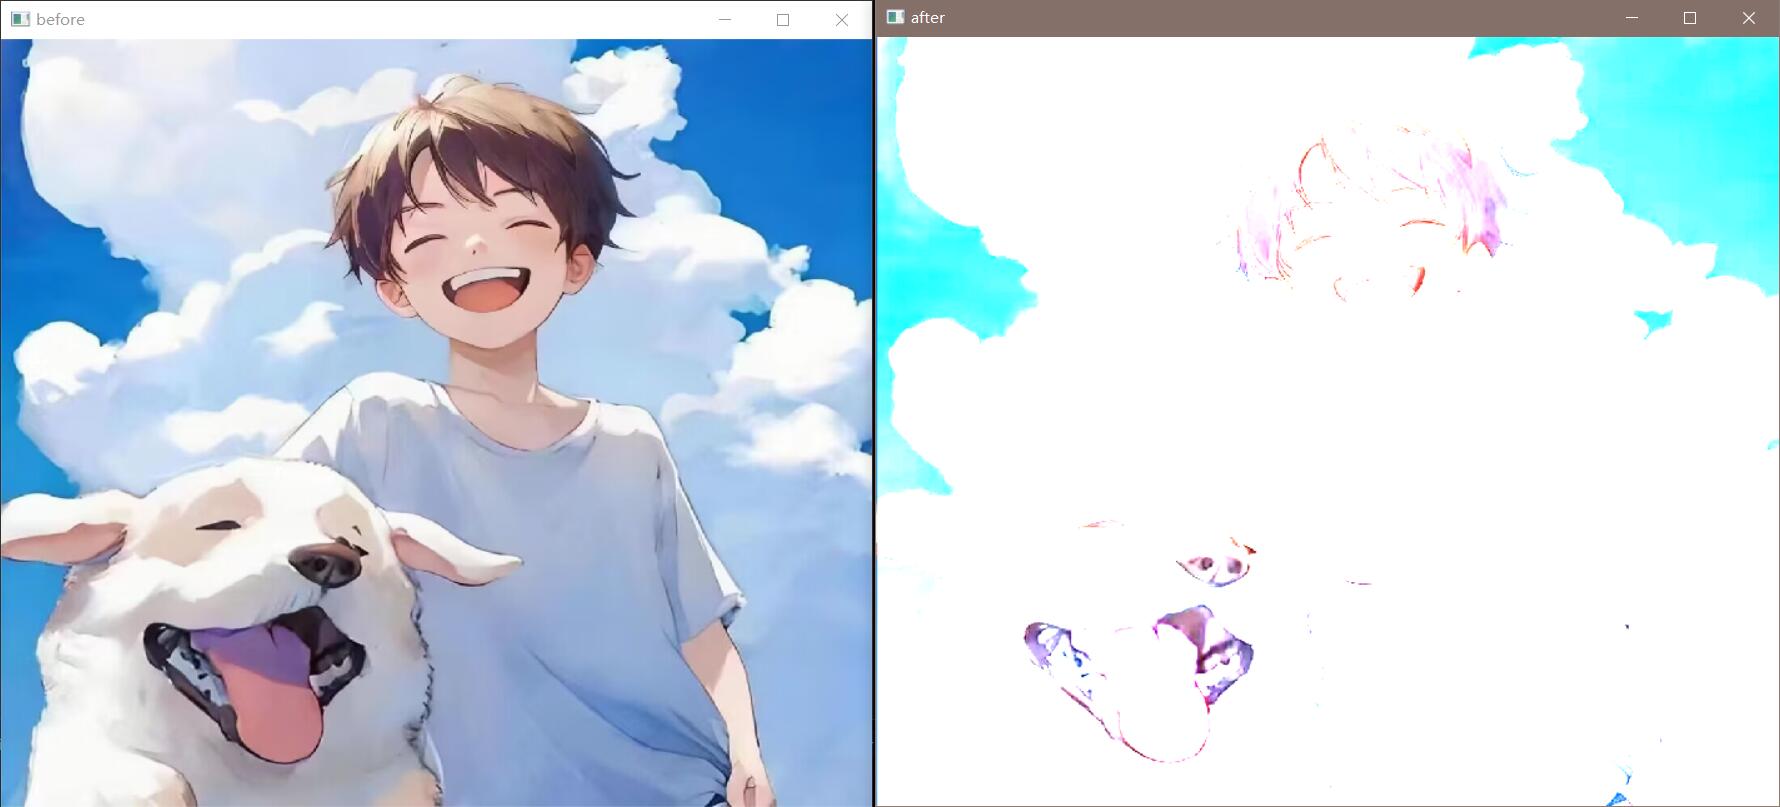
转化图像颜色通道

函数原型:

1
void cvtColor(InputArray src, OutputArray dst, int code, int dstCn = 0)

第一参数是输入图像,第二参数是输出图像,第三参数是转化图像颜色通道代码,第四参数暂不管。

转化图像颜色通道代码有许多,通常用到:

  1. COLOR_BGR2GRAY :由OpenCV的BGR通道转为灰度通道。

  2. COLOR_BGR2BGRA :由OpenCV的BGR通道添加了Alpha通道。

读取、显示视频

与使用摄像头的思路类似,将捕获设备改为捕获本地文件。

1
cv::VideoCapture cap("src/test.mp4");

显示与使用摄像头的思路类似,捕获视频每一帧并展示图像对象。

写入视频

定义编解码器并创建VideoWriter对象进行保存。

1
2
int fourcc = cv::VideoWriter::fourcc('X', 'V', 'I', 'D');   // 编解码器
cv::VideoWriter out("output.avi", fourcc, 20.0, cv::Size(640, 480));

VideoWriter的其中一个构造函数原型如下:

1
VideoWriter(const String& filename, int fourcc, double fps, Size frameSize, bool isColor = true)

2.2.2 示例代码

1
2
3
4
5
6
7
8
9
10
11
12
13
14
15
16
17
18
19
20
21
22
23
24
25
26
27
28
#include <opencv2/opencv.hpp>
#include <iostream>

int main()
{
cv::VideoCapture cap(0);
cv::Mat img;
int fourcc = cv::VideoWriter::fourcc('X', 'V', 'I', 'D');
cv::VideoWriter out("output.avi", fourcc, 20.0, cv::Size(640, 480));

while (cap.isOpened())
{
if (!cap.grab())
{
std::cout << "摄像头错误" << std::endl;
break;
}
out.write(img);
cap.read(img);
cv::imshow("video", img);
if (cv::waitKey(1) == 'q') break;
}

cap.release(); // 释放视频捕获对象
out.release(); // 释放视频写入对象
cv::destroyWindow("video");
return 0;
}

图像的基本操作

创建空白图像

使用 Mat 创建图像矩阵的常用形式:

  1. 创建空图像,大小为0:
1
cv::Mat image1;
  1. 指定矩阵大小,指定数据类型
1
cv::Mat image2(100, 100, CV_8U);
  • 创建100行×100列的矩阵,数据类型为无符号8位int,即灰度图像。

  • 还有一种常用的类型CV_8UC3,表示三通道无符号8位int。

  1. 指定矩阵大小,指定数据类型,设置初始值
1
cv::Mat image3(100, 100, CV_8U, 100)
  • 创建100行×100列的矩阵,数据类型为无符号8位int灰度图像,灰度值为100。

  • 对于三通道图像,应使用Scalar():

1
cv::Mat image(640, 640, CV_8UC3, cv::Scalar(100, 100, 0));

获取图像信息

获取行列数、通道数

直接访问Mat类成员rows、cols和函数channels()返回图像的行、列和通道数。可以通过通道数判断是灰度图像(通道为1)还是彩色图像(通道为3)。

1
2
3
std::cout << "图像的行:" << image.rows << std::endl;
std::cout << "图像的列:" << image.cols << std::endl;
std::cout << "通道数:" << image.channels() << std::endl;

访问像素点的BGR值

通过Vec3b数据类型访问返回像素点的BGR值,注意,前者是行数,后者是列数。

1
2
3
4
int blue = image.at<cv::Vec3b>(100, 100)[0];
// 索引值0表示索引BGR值中的B,也就是蓝色通道的数值
int green = image.at<cv::Vec3b>(100, 100)[1];
int red = image.at<cv::Vec3b>(100, 100)[2];

同理进行修改:

1
2
image.at<cv::Vec3b>(100, 100)[0] = 201;
// 将坐标(100, 100)的像素点蓝色数值改为201

当然大面积的修改才会明显,通过循环进行:

1
2
3
for(int i = 0; i < 100; ++ i)
for (int j = 0; j < 100; ++ j)
image.at<cv::Vec3b>(i, j)[0] = 100;

更改像素点

如果修改BGR值,则组成Vec3b类型:

1
2
3
for(int i = 0; i < 100; ++ i)
for (int j = 0; j < 100; ++ j)
image.at<cv::Vec3b>(i, j) = cv::Vec3b(255, 0, 0);

标记区域

创建tmp变量,获取图像行从200到1000,列从200到1000的区域。将图像行从1200到2000,列从1200到2000的区域变成tmp

1
2
3
cv::Mat image = cv::imread("src/test.jpg");
cv::Mat tmp = image(cv::Range(100, 200), cv::Range(100, 200));
tmp.copyTo(image(cv::Range(200, 300), cv::Range(200, 300)));

遍历图像

循环行和列遍历图像

对于OpenCV的Mat,其顺序是行和列。与C++的二维数组类似,遍历:

1
2
3
for(int i = 0; i < 100; ++ i)
for (int j = 0; j < 100; ++ j)
image.at<cv::Vec3b>(i, j) = cv::Vec3b(255, 0, 0);

指针扫描

1
2
3
4
5
6
7
8
9
10
11
12
13
14
15
16
17
18
19
20
21
22
23
24
25
26
27
28
29
30
31
32
#include <opencv2/opencv.hpp>
#include <iostream>

int main()
{
cv::Mat img = cv::imread("src/test.jpg");
cv::Mat output_img;
output_img = cv::Mat(img.size(), img.type()); // 复制画布
output_img = img.clone(); // 克隆像素值
int r = img.rows, c = img.cols, channels = img.channels();


for (int j = 0; j < r; j ++)
{
const uchar *now = img.ptr<uchar>(j); // 原图当前行指针
uchar *output = output_img.ptr<uchar>(j); // 输出图像当前行指针
// 实际上每一列都由通道数三个数据组成,所以实际上列数应该是通道数×列
for (int i = channels; i < c * channels; i ++)
{
output[i] = cv::saturate_cast<uchar>(5 * now[i]);
// saturate_cast保证了计算结果仍在0~255之间
}
}

cv::namedWindow("before", cv::WINDOW_NORMAL);
cv::namedWindow("after", cv::WINDOW_NORMAL);
cv::imshow("before", img);
cv::imshow("after", output_img);
cv::waitKey(0);
cv::destroyAllWindows();
return 0;
}

结果展示

绘图入门

静态绘制

绘制线

函数原型:

1
void line(InputOutputArray img, Point pt1, Point pt2, const Scalar& color,int thickness = 1, int lineType = LINE_8, int shift = 0)

参数分别为:图像对象、始点坐标、终点坐标、颜色、线粗细、线类型……

使用示例:

1
cv::line(image, cv::Point(0, 0), cv::Point(512, 512), cv::Scalar(255, 0, 0), 5);

绘制矩形

函数原型:

1
void rectangle(InputOutputArray img, Rect rec, const Scalar& color, int thickness = 1, int lineType = LINE_8, int shift = 0)

参数分别为:图像对象、矩形框、颜色、边框线粗细、边框线类型……

矩形框的四个参数分别为:x坐标、y坐标、宽、高。

使用示例:

1
cv::rectangle(image, cv::Rect(0, 0, 100, 100), cv::Scalar(0, 255, 255), 5);

绘制圆

函数原型:

1
void circle(InputOutputArray img, Point center, int radius, const Scalar& color, int thickness = 1, int lineType = LINE_8, int shift = 0)

参数分别为:图像对象、圆心、半径、颜色、边框线粗细、边框线类型……

使用示例:

1
cv::circle(image, cv::Point(319, 319), 50, cv::Scalar(0, 0, 255), 5);

绘制椭圆

函数原型:

1
void ellipse(InputOutputArray img, Point center, Size axes, double angle, double startAngle, double endAngle, const Scalar& color, int thickness = 1, int lineType = LINE_8, int shift = 0)

参数分别为:图像对象、中心点、长短轴、初始旋转角度、椭圆开始角度、椭圆结束角度、颜色、边框线粗细、边框线类型……边框线粗细为-1表示内填充。

使用示例:

1
cv::ellipse(image, cv::Point(319, 119), cv::Size(100, 50), 0, 180, 360, 255, -1);

绘制多边形

函数原型:

1
void polylines(InputOutputArray img, const Point* const* pts, const int* npts, int ncontours, bool isClosed, const Scalar& color, int thickness = 1, int lineType = LINE_8, int shift = 0 )

参数分别为:图像对象、const修饰的指向多边形数组的指针、多边形顶点个数的数组名、绘制多边形的个数、是否闭合、颜色、边框粗细、边框线类型

使用示例:

1
2
3
4
5
6
7
8
9
// 构造多边形的端点形成的点类型数组。
cv::Point pts[] = { cv::Point(10, 5), cv::Point(20, 30), cv::Point(70, 20), cv::Point(50, 10) };

// const修饰的多边形数组指针
const cv::Point *ppt[1] = { pts };

// 多边形顶点个数的数组名
int npt[] = { 4 };
cv::polylines(image, ppt, npt, 1, true, cv::Scalar(0, 255, 255));

添加文本

函数原型:

1
void putText( InputOutputArray img, const String& text, Point org, int fontFace, double fontScale, Scalar color, int thickness = 1, int lineType = LINE_8, bool bottomLeftOrigin = false )

参数分别为:图像对象、文本内容、文字在图像中的左下角坐标、字体、字体大小、字体颜色、字体粗细、描绘字体的线类型……

使用示例:

1
cv::putText(image, "OpenCV", cv::Point(10, 500), cv::FONT_HERSHEY_SIMPLEX, 4, cv::Scalar(255, 255, 255), 2, cv::LINE_AA);

整体绘制展示

1
2
3
4
5
6
7
8
9
10
11
12
13
14
15
16
17
18
19
20
21
22
23
#include <opencv2/opencv.hpp>
#include <iostream>

int main()
{
cv::Mat image(640, 640, CV_8UC3);

cv::line(image, cv::Point(0, 0), cv::Point(512, 512), cv::Scalar(255, 0, 0), 5);
cv::rectangle(image, cv::Rect(0, 0, 100, 100), cv::Scalar(0, 255, 255), 5);
cv::circle(image, cv::Point(319, 319), 50, cv::Scalar(0, 0, 255), 5);
cv::ellipse(image, cv::Point(319, 119), cv::Size(100, 50), 0, 180, 360, 255, -1);

cv::Point pts[] = { cv::Point(10, 5), cv::Point(20, 30), cv::Point(70, 20), cv::Point(50, 10) };
const cv::Point *ppt[1] = { pts };
int npt[] = { 4 };
cv::polylines(image, ppt, npt, 1, true, cv::Scalar(0, 255, 255));
cv::putText(image, "OpenCV", cv::Point(10, 500), cv::FONT_HERSHEY_SIMPLEX, 4, cv::Scalar(255, 255, 255), 2, cv::LINE_AA);

cv::namedWindow("img", cv::WINDOW_NORMAL);
cv::imshow("img", image);
cv::waitKey(0);
return 0;
}

整体展示

鼠标绘制

1
2
3
4
5
6
7
8
9
10
11
12
13
14
15
16
17
18
19
20
21
22
23
24
25
26
27
28
29
30
31
32
33
34
35
36
37
38
39
40
41
42
43
44
45
46
47
48
49
50
51
52
53
54
55
56
57
58
59
60
61
62
63
64
65
66
67
68
69
70
71
72
73
74
75
76
#include <opencv2/opencv.hpp>
#include <iostream>

cv::Mat image(640, 640, CV_8UC3); // 画布
bool drawing = false; // 是否绘画
bool mode = true; // 矩形绘制还是圆形绘制
int ix, iy = -1;
int r, g, b, t = 0;


// 绘画函数
void draw(int event, int x, int y, int flags, void *param)
{
if (event == cv::EVENT_LBUTTONDOWN) // 当鼠标按下时
{
drawing = true; // 启动绘画
ix = x; // 获取起点坐标
iy = y;
}
else if (event == cv::EVENT_MOUSEMOVE) // 当鼠标移动时
{
if (drawing) // 处于绘画状态
{
if (mode) // 矩形绘制时
{
cv::rectangle(image, cv::Point(ix, iy), cv::Point(x, y), cv::Scalar(b, g, r), t * 20);
}
else // 圆形绘制时
{
cv::circle(image, cv::Point(x, y), 5, cv::Scalar(b, g, r), t * 20);
}
}
}
else if (event == cv::EVENT_LBUTTONUP) // 当鼠标松开时
{
drawing = false; // 关闭绘画
if (mode) // 补上最后一笔, x和y是当前的坐标
{
cv::rectangle(image, cv::Point(ix, iy), cv::Point(x, y), cv::Scalar(b, g, r), t * 20);
}
else
{
cv::circle(image, cv::Point(x, y), 5, cv::Scalar(b, g, r), t * 20);
}
}
}

int main()
{
cv::namedWindow("image", cv::WINDOW_NORMAL);
cv::setMouseCallback("image", draw); // 绑定画布和回调函数
cv::createTrackbar("R", "image", 0, 255); // 轨迹栏
cv::createTrackbar("G", "image", 0, 255);
cv::createTrackbar("B", "image", 0, 255);
cv::createTrackbar("Thickness", "image", 0, 5);

while (true)
{
cv::imshow("image", image);
int k = cv::waitKey(1) & 0xFF;
if (k == 'q')
{
break;
}
else if (k == 'm')
{
mode = !mode;
}
r = cv::getTrackbarPos("R", "image"); // 刷新绘图属性
g = cv::getTrackbarPos("G", "image");
b = cv::getTrackbarPos("B", "image");
t = cv::getTrackbarPos("Thickness", "image");
}
cv::destroyAllWindows();
return 0;
}

鼠标绘制